Outfit Maker
Add 1 to 4 clothing photos and the outfit maker lays them out as one outfit, flat or on a model. Your first image is free, no sign-up.
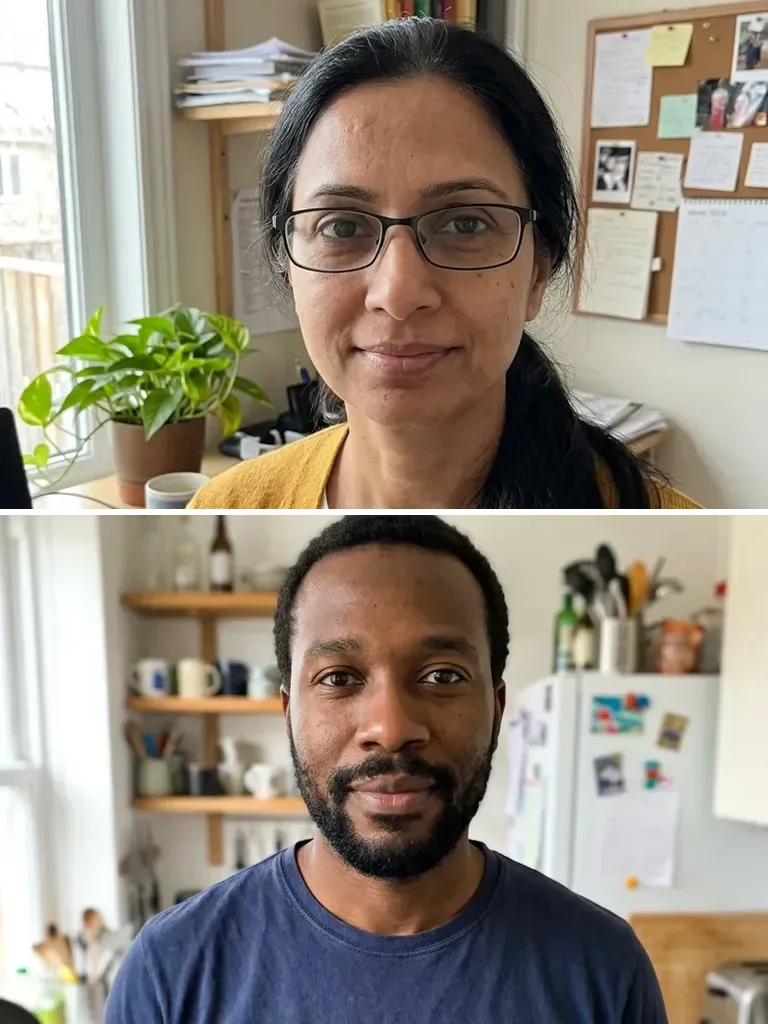 Before
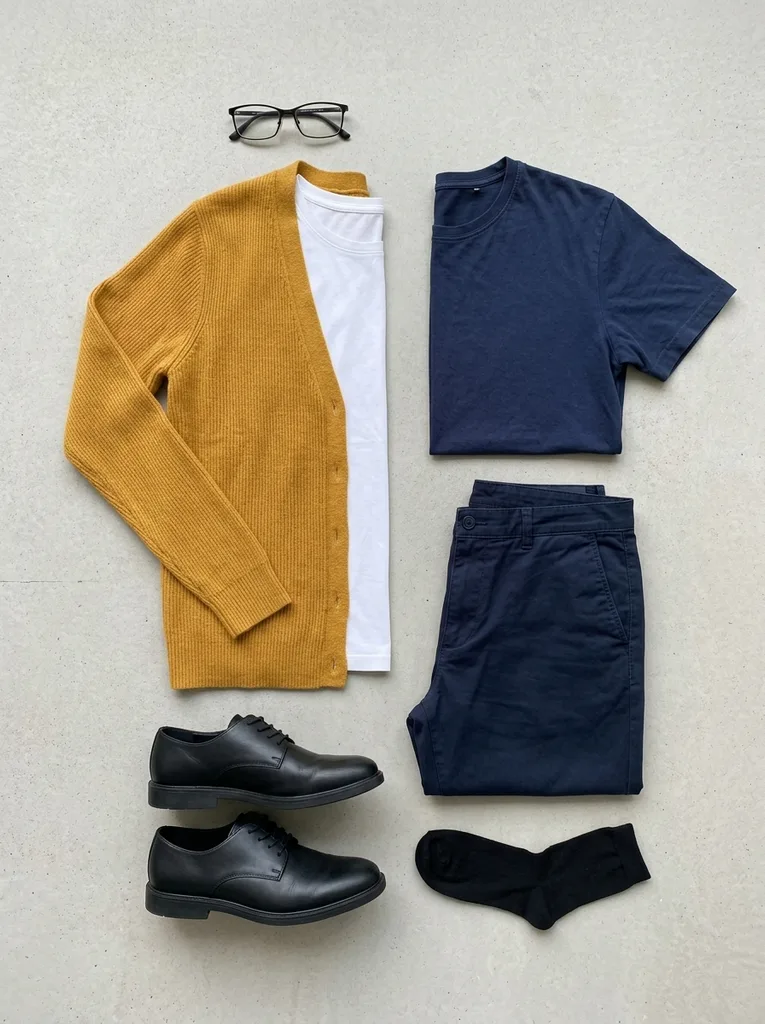 After
Example result. Upload your photo to make yours.
How to use the outfit maker
Three steps from loose pieces to one picture of the whole outfit.
- 1
Upload your pieces
Add 1 to 4 photos of tops, bottoms, shoes or accessories as JPEG, PNG or WebP, up to 10 MB each. A piece can lie flat, hang on a hanger or be worn by someone.
- 2
Choose Flat Lay or On a Model
Flat Lay arranges the outfit from above on a plain light background, with no person. On a Model shows it on one new adult model in a full-body studio shot. A short note such as "smart casual" is optional.
- 3
Generate and download
The outfit maker returns one 3:4 portrait image in the Result panel. Download it there, because nothing is saved to a wardrobe or board.
An outfit maker for clothes you already own
One picture of a finished outfit, made from photos of real pieces.
This outfit maker takes photos of separate pieces and puts them together into one image of a complete outfit. It is not a closet app: there is no wardrobe to catalog, no account to open and no board to arrange by hand. You upload the pieces and the layout is done for you.
The model is told to copy each uploaded item's type, color, pattern and fabric and to include every one once. Where the pieces don't make a whole outfit, it fills the gaps with plain, neutral basics. In our test, two chest-up photos of people supplied a mustard cardigan and two T-shirts. The flat-lay added navy trousers, black shoes and socks, and picked up the glasses one of them wore. Their faces, hair and rooms stayed out of it.
The result is AI output, so compare each piece with your photo before you rely on it.
Made for
- Shoppers pairing a new buy with what they own
- Anyone planning a trip or event outfit
- Resellers styling separate pieces
- Stylists sketching a look for a client
- Friends mixing pieces from two closets
Photo tips for a cleaner outfit maker result
The output can only be as clear as the pieces you give it.
- Put one piece in each photo; with four slots, a top, a bottom, shoes and one accessory cover a full outfit.
- Show the whole garment, hem and sleeves included, because any part the frame cuts off has to be drawn by the model.
- Shoot on a plain surface or a hanger in even daylight so color and pattern read clearly.
- A photo of someone wearing the piece works, since the outfit maker is told to take only clothes and accessories, not the face, hair or room.
- Crop out glasses, bags or jewelry you don't want in the look, as a visible accessory may end up in the outfit.
- Use the note to choose what fills the gaps, for example "add white sneakers"; otherwise the model picks plain basics.
- A HEIC photo from a phone is converted in the browser before upload, so you don't need to change it yourself.
- Leave out swimwear, underwear and lingerie: typed requests for them are refused, and the model is told to keep every outfit fully clothed.